
A slim line can be cut into silver, filled with a dark material, or built from a length of wire. A flower can rise from a sheet or sit on it as a separate piece. Looking closely at those differences makes an object more interesting—and gives a collector better questions to ask.
How makers shape silver follows sheet, grain, wire and strip into objects. Here we begin with their surfaces. The same piece can carry several of these techniques, applied at different stages or later in its life.
Filigree: a drawing made of wire
Fine wires, sometimes twisted or beaded, are shaped and joined into a pattern. Filigree can form airy openwork or sit against a backing. Follow the line with your eye: does it turn into a loop, cross another wire, or frame an opening?
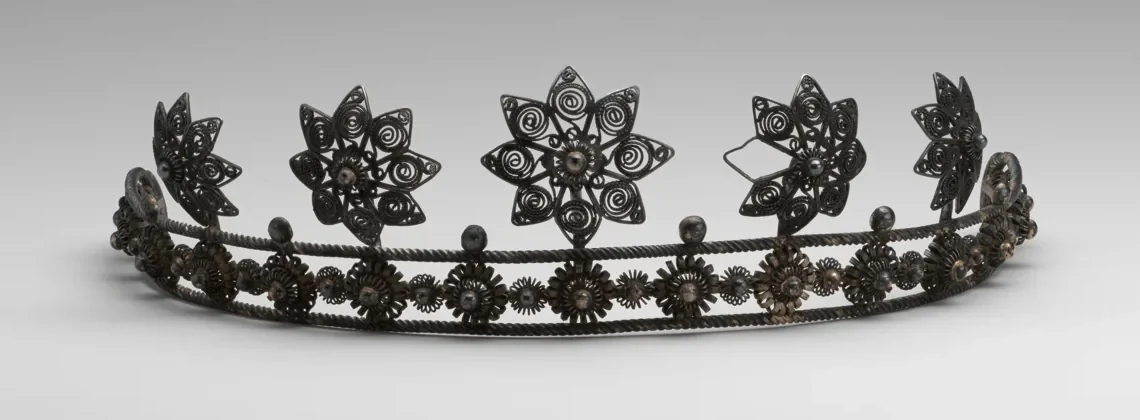
Tostrup’s Norwegian tiara, made around 1873, uses wire to give its upright floral forms a lace-like rhythm. In the much earlier Etruscan fibula below, the Met identifies serpentine and beaded wires on a hollow bow; the plain clasp sets off the decorated portion. Similar-looking openwork may be cast or pierced, so a photograph alone may not settle how it was made.
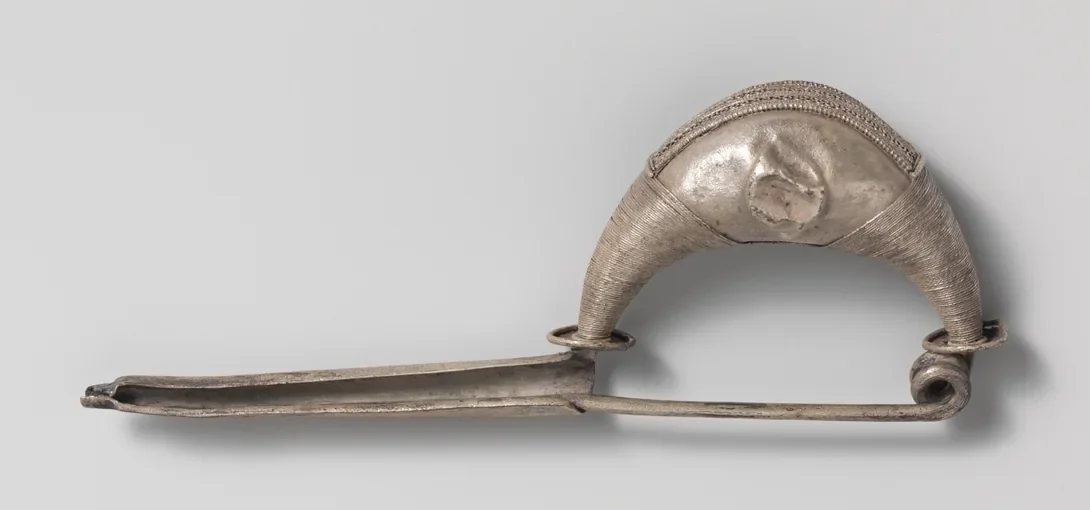
Look for: individual strands, joins, flattened or broken wires, and repairs. Ask for clear views of the reverse and attachments; an attributed technique or maker should be supported by the object’s record and close examination.
Niello: dark lines against silver
Niello is a dark metallic inlay set into recessed decoration. In this small pendant, black lines define a profile against a light field, while a gilt rim adds warmth. The Met identifies its materials as silver, niello and gilt silver. A dark line alone is not enough to distinguish niello from another filling, surface treatment, dirt or shadow.
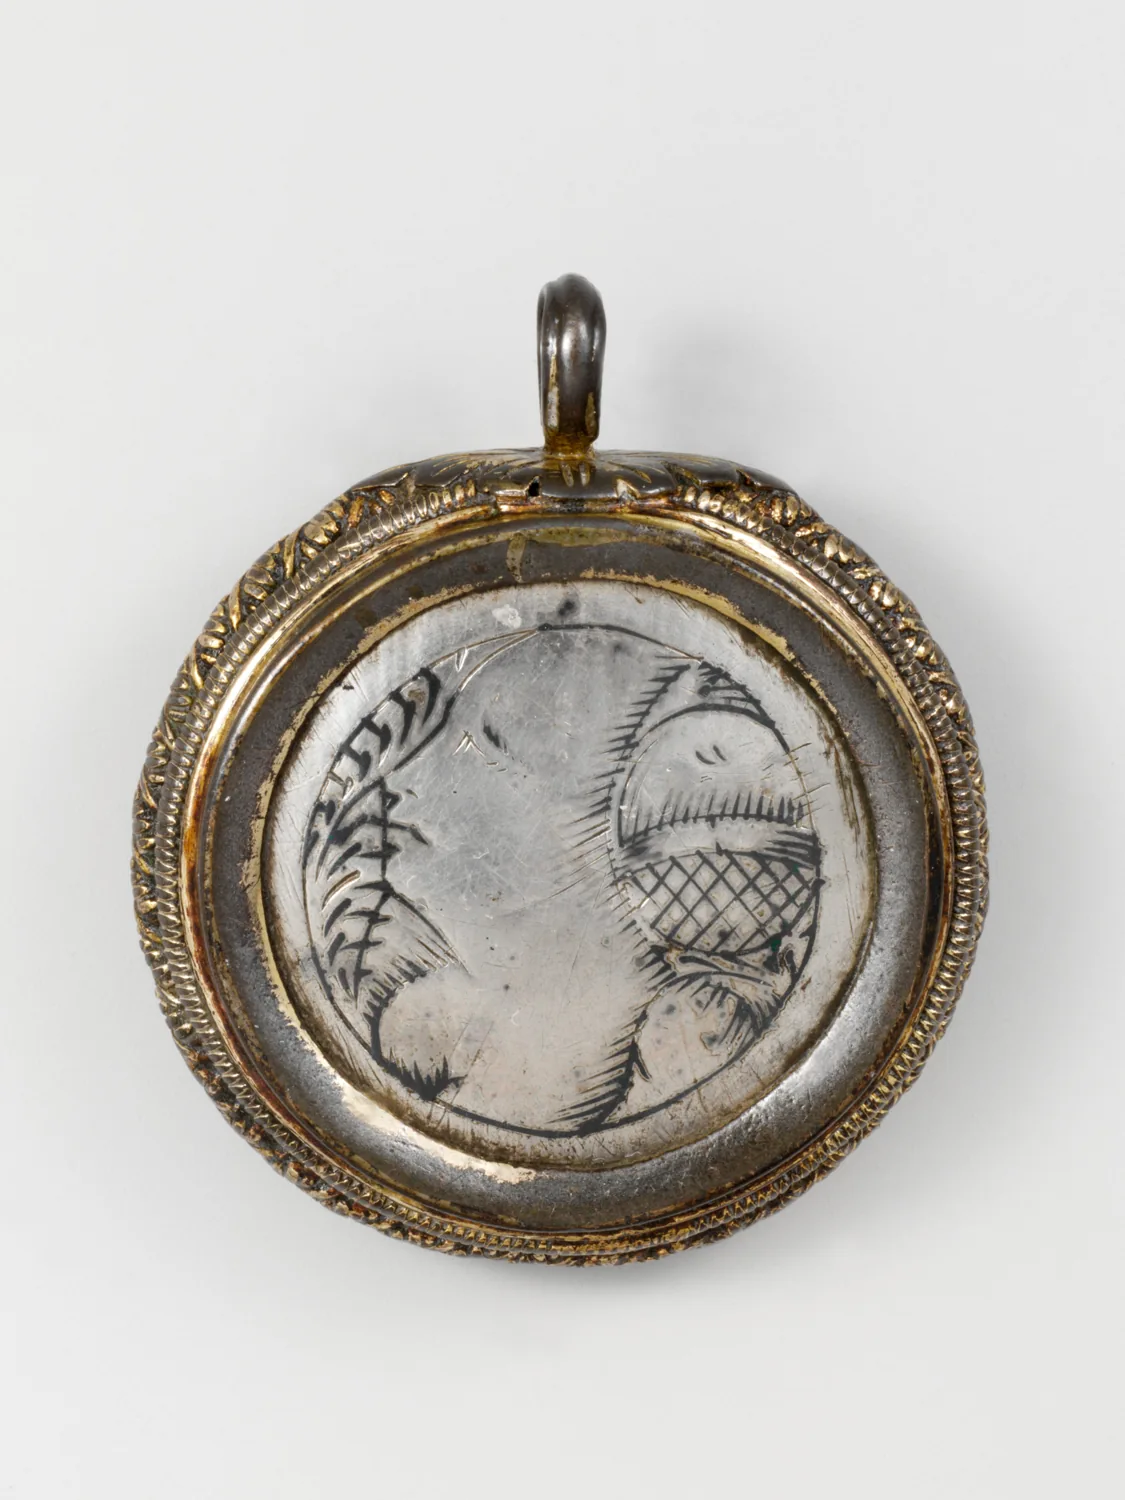
Look for: the relationship between dark areas and the surrounding incised design, losses or unevenness, and wear at the edges. The pendant is only 3.8 cm across. Its museum record supplies materials, date and attribution that the image alone cannot establish. Compare it with its companion pendant.
Engraving: a line cut into metal
An engraver removes metal with a cutting tool, making grooves that can describe lettering, outlines or shading. On an object, look for the direction and character of the cuts, how lines begin and end, and how they relate to a monogram or border. The portrait lines in the pendant invite close comparison, but the Met’s material description—not a picture of a dark groove—establishes its niello identification.
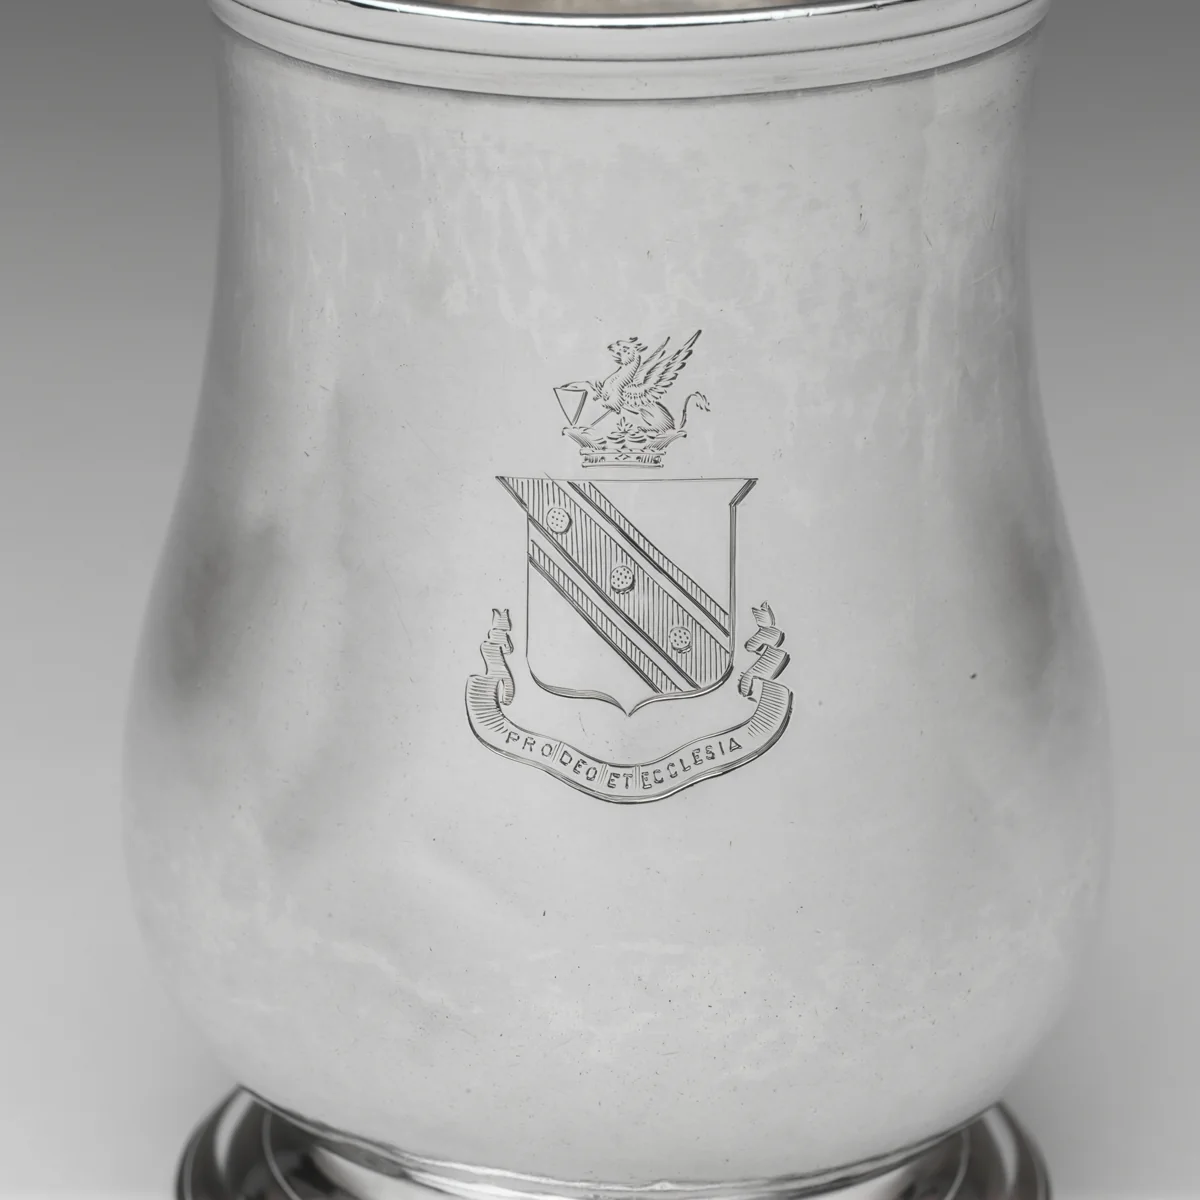
On this Boston silver cann, the Met identifies the engraved Bishop family arms and notes that they may have been added later. The close view shows a shield, crest and motto; it also makes the date of the engraving a separate question from the date of the vessel.
Look for: incised lines, variations in width and places where wear has softened them. Later inscriptions, mechanical engraving and hand engraving can coexist; an apparently crisp line does not date the object or prove who cut it.
Repoussé and chasing: relief from two sides
Repoussé generally raises a design by working sheet from the reverse; chasing works the visible face to define or refine it. Both move metal rather than cutting a line away. They may work together. A raised motif can also be cast or applied separately, and the back may be concealed, filled or altered.
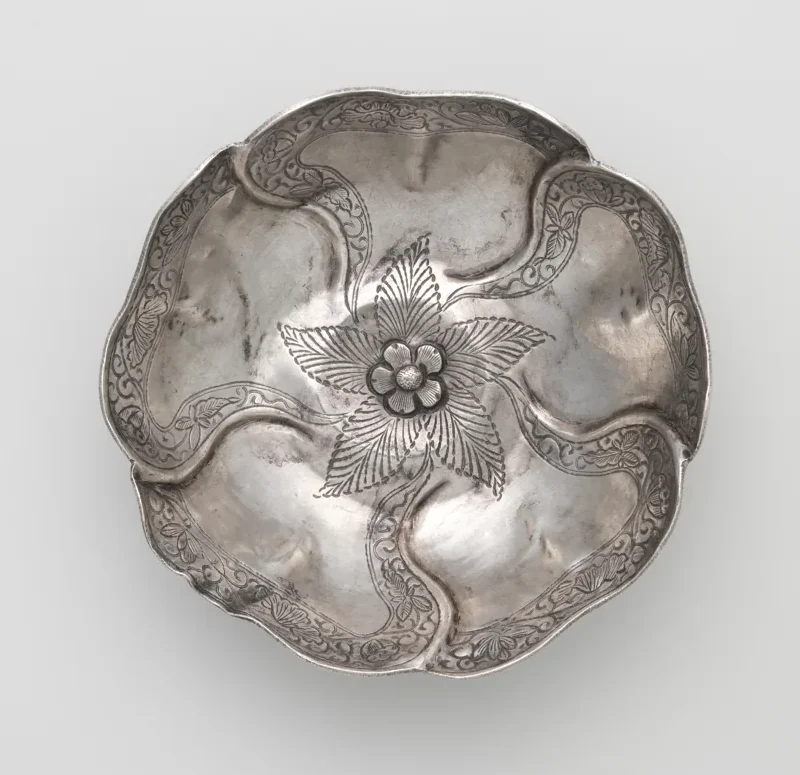
The Met identifies chased and repoussé decoration on this small Southern Song cup, 9.5 cm across. Its lobed form, central flower and scrolling bands show how contours and fine details can share a surface. The catalogued techniques do not by themselves establish how the cup was first formed.
Look for: changes in height, tool-defined edges and, where safely visible, corresponding forms on the reverse. Ask whether the relief is integral or attached, and whether restoration affects what can be seen.
Gilding: gold on a silver surface
Gilding adds a thin gold surface to silver. It can cover an object or pick out selected details. On the Germanic buckle, the Met identifies gilded silver and niello in the outer border: warm and dark accents share the same small object.
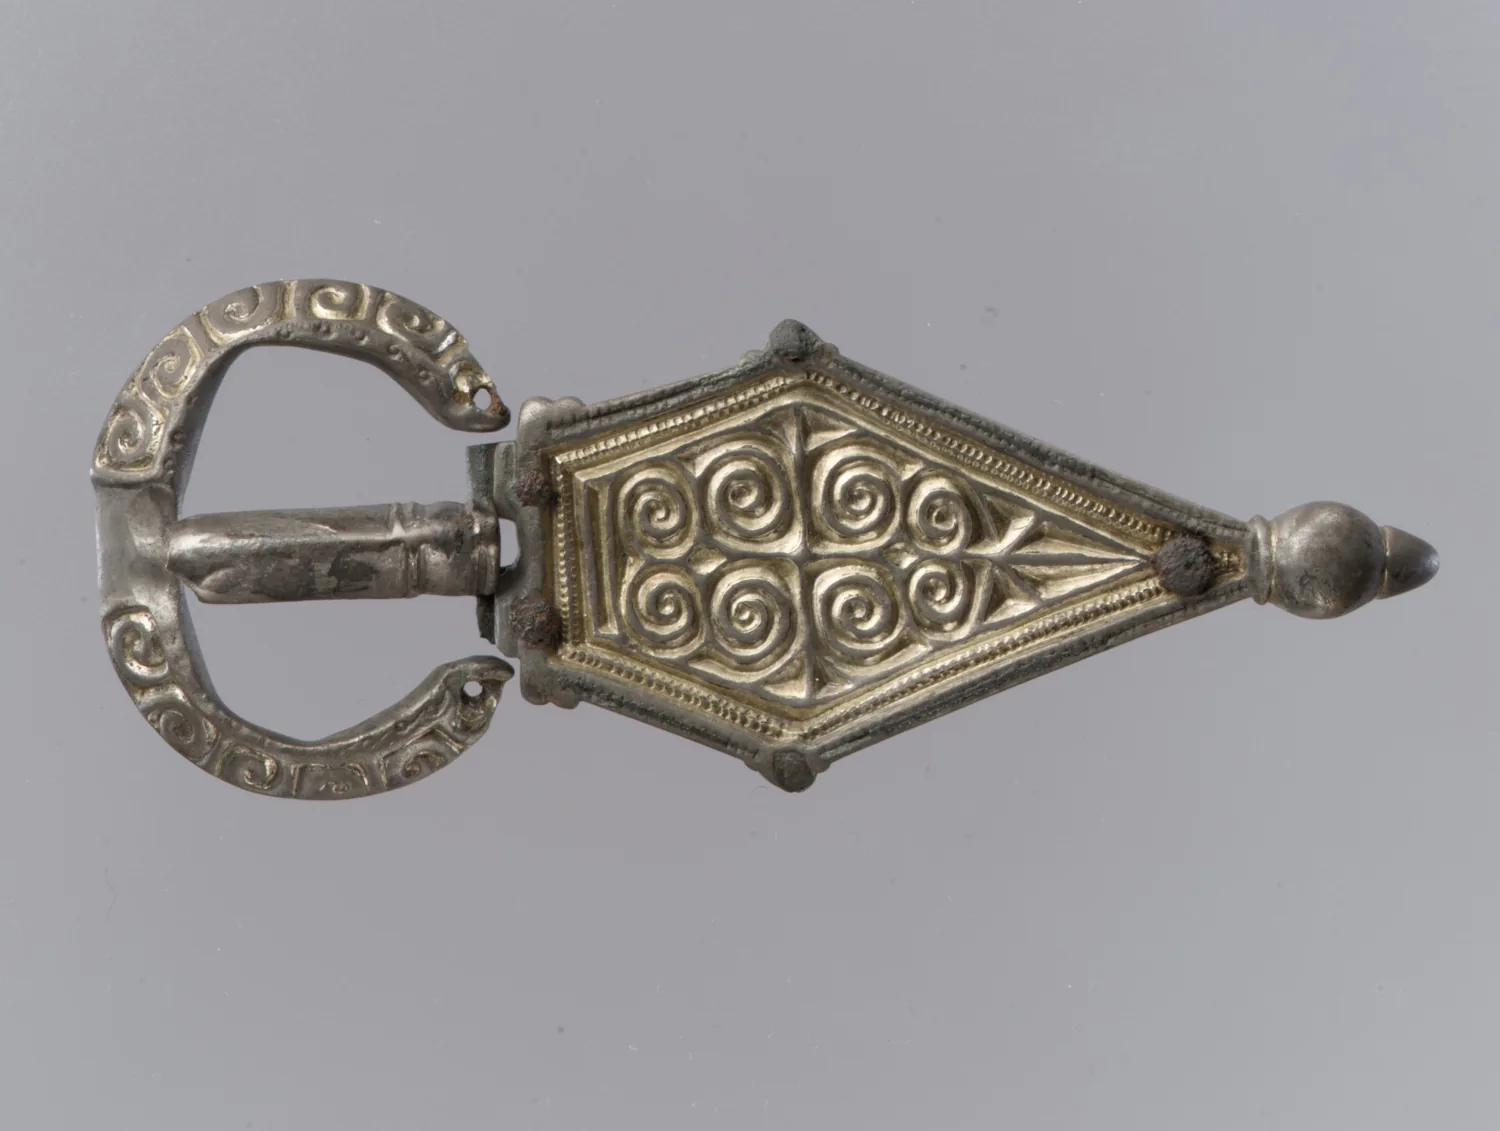
Look for: where the gold color survives, especially in recesses and at exposed edges. Color alone cannot establish the method, original extent or date of gilding. Later regilding, wear and photography can change the impression; a museum or conservator may have evidence unavailable to the eye.
Keep the observation separate from the conclusion
Record the feature, its location and photographs before assigning a technique. Compare the front, reverse, edges and joins where accessible. Ask for maker statements, museum records, provenance, condition reports or specialist examination when the question matters. A technique alone does not establish age or authenticity.
These surfaces can be delicate and dark areas may be intentional. Avoid treating contrast as dirt or polishing away evidence; consult a qualified conservator about a vulnerable object. Continue with documenting a collection and silver authenticity.
Sources & further reading
The object captions link to the institutions’ records. For the terms and their overlap, see the Victoria and Albert Museum’s metalworking guide. Object dates and materials follow the cited records, checked November 2026.